![]() My first experience with glass etching was in my 8th grade Advanced Art class. We took 10 inch mirrored tiles, covered them in contact paper, and carved out our own designs with Xacto knives
My first experience with glass etching was in my 8th grade Advanced Art class. We took 10 inch mirrored tiles, covered them in contact paper, and carved out our own designs with Xacto knives![]() . Then we had to wait in line so the teacher could put the etching cream on for us… she trusted a bunch of 14 year-old with sharp little knives, but not with acid. That was probably a smart decision.
. Then we had to wait in line so the teacher could put the etching cream on for us… she trusted a bunch of 14 year-old with sharp little knives, but not with acid. That was probably a smart decision.
Skip ahead 13 years… This past holiday season, I saw a piece of “customized” Pyrex![]() online, and a little light bulb went off in my head. I can do that! I went out and bought an Xacto knife
online, and a little light bulb went off in my head. I can do that! I went out and bought an Xacto knife![]() , some contact paper, the etching cream, and a few sizes of Pyrex
, some contact paper, the etching cream, and a few sizes of Pyrex![]() pans. I tried to explain my plan to my parents, but they didn’t really get what I was envisioning.
pans. I tried to explain my plan to my parents, but they didn’t really get what I was envisioning.
I made a cute 8×8 pan for my sister, added a pouch of brownie mix and wrapped it up. Pretty clever I think. I then made one for a good friend who lives on the East Coast… not AS clever, Pyrex![]() is heavy and glass, luckily it made it to her in one piece 🙂 They turn out pretty neat, and it’s always exciting to see the look on people’s faces when they realize you are giving them more than an ordinary baking dish. Slowly but surely, all my moms friends in the neighborhood are getting one for their birthdays…
is heavy and glass, luckily it made it to her in one piece 🙂 They turn out pretty neat, and it’s always exciting to see the look on people’s faces when they realize you are giving them more than an ordinary baking dish. Slowly but surely, all my moms friends in the neighborhood are getting one for their birthdays…
 So, for my good friend’s Bridal Shower gift, I knew a custom dish with her new Last Name would be the perfect gift. And she loved it! So much so, she asked me to etch her Champagne Flutes. Oh dear… How could I say no?? I did have to conquer a few obstacles, namely working on a round surface and carving out little letters… not easy, but after about 3or 4 hours today, I succeeded in making a pair of His & Hers flutes for their special day!
Here is a brief photo-tutorial on the custom etching process.
How to Etch:
Special Notes
- Go slow! Each dish takes me about an hour just to “carve”, the flutes took 1.5 hours… it’s because one wrong cut and you’ll have to start over, or get really creative with masking tape. Curved lines are very tricky, so watch out.
- That etching cream
 is essentially ACID! It’s eating away a layer of glass, you don’t want the stuff on your skin or in your eyes. You should really wear gloves when handling this stuff. Also, I do the final rinse off outside in the dirt, as acid probably isnt good for your plumbing.
 - When etching on the glass baking dishes, I etch the bottom. When you look down at the pan, you need to read the name normally. Do you see where I’m going with this? Use your computer to make a MIRROR IMAGE of the text/picture you are stenciling. I forgot this step once, after I had cut the whole pattern out, but luckily before I used the cream.
- Most sizes of Pyrex
 have a HUGE logo embossed in the middle. You can etch over it/around it, but it still detracts a lot from your design. Another brand of bakeware called Anchor Hocking
 only has a little Anchor logo in the middle. It is also a little less expensive.
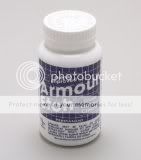
 - The most expensive part of this project is the etching cream. I spent $20 for a 10oz jar
 . BUT it is seriously going to last forever! This doesn’t mean I’m stingy with the application; you need to completely COVER all exposed areas until no glass shows through at all. BUT you are scraping 99% of it off and putting it back in the jar.
I think glass etching is a great project because you can let your creativity run wild. Pretty much anything glass can be etched on… Pyrex, picture frames, the windows of your car… please, just be careful with those knifes and jars of acid. Have fun! 🙂
*Questions? Leave a comment and I’ll be sure to get back to you!


Love the project and I am trying to etch bakeware for x-mas gifts. I am using Armour etching cream-but it does not work on Pyrex. Does the Anchor Hocking brand of bakeware always etch or will I have problems with it as well. I don’t know what brand of bakeware to buy and it is too expensive to purchase trial and error. Can you give me any advice?
I have used Armor Etch and Pyrex and Anchor Hawking without a problem :/ Sometimes I leave it on longer than the jar specifies, then when you rinse it off you let it dry completely for the design to show.
It’s been my experience that you really need to shake up the etching cream before you apply it; otherwise it doesn’t work as well. This could have been Janet’s problem.
In the past month I etched 10 pans for a co-worker, pans that she already owned. You could tell that some were older than others… and you’re right, some of the pans wouldn’t etch with the cream & same process. Perhaps older pans had some kind of protective coating? All of the pyrex and anchor pans I have bought in the last 3 years seem to work out well 🙂
Do you have to use a brand new pyrex pan or can it be a used one?
I have etched old pans. Some take the etching, some do not. Older pyrex used a different type of glass (different composition), so to be safe, I would use a new pan.
I used Corning Pyrex & left the Armour Etching cream on 15 minutes. When I rinsed it there was no etching whatsoever. My Pyrex pan is probably 15 years old or older. Any suggestions?
The same thing happened to me when I tried to use an old Pyrex dish my neighbor already owned.
I researched it and I there was a different production process used for the older pans. The old Pyrex made by Corning is a “different” glass (they changed the composition) than the Pyrex you buy now. The European Pyrex glass is also a different.