I have been looking forward to trying this recipe for days… I found it out in Blog-land, where it made the round about 2 years ago when it was 1st printed in the NY Times. Since I love eating bread and conveniently own a Le Creuset dutch oven that doesn’t get enough attention, this seemed like the perfect weekend project 😀
Luckily, I learned my lesson from my previous quilting nightmare, and I re-read the recipe a few times before getting started. Apparently, I missed a key word in the recipe the first time around: instant. It calls for instant yeast. Not active-dry yeast. Oh dear. I didn’t actually realize there was a big difference. And there’s not, per say, I just need to tweak the initial mixing of the dough a little bit. I feel a lot better knowing that MANY home-bakers ran into the same problem.
I want the bread to be warm and fresh for dinner tomorrow night, which means I’ll actually start making it around 8 pm tonight 😐 Yes, the entire process takes about 22 hours… though most of that is just letting it sit covered in a bowl in the kitchen, letting me move on to more important things like watching Project Runway and Psych.

Published: November 8, 2006, The New York Times
Adapted from Jim Lahey, Sullivan Street Bakery
- 3 cups all-purpose or bread flour more for dusting
- ¼ teaspoon instant yeast
- 1¼ teaspoons salt
- Cornmeal or wheat bran as needed
-
In a large bowl combine flour, yeast and salt. Add 1 5/8 cups water, and stir until blended; dough will be shaggy and sticky. Cover bowl with plastic wrap. Let dough rest at least 12 hours, preferably about 18, at warm room temperature, about 70 degrees.
-
Dough is ready when its surface is dotted with bubbles. Lightly flour a work surface and place dough on it; sprinkle it with a little more flour and fold it over on itself once or twice. Cover loosely with plastic wrap and let rest about 15 minutes.
-
Using just enough flour to keep dough from sticking to work surface or to your fingers, gently and quickly shape dough into a ball. Generously coat a cotton towel (not terry cloth) with flour, wheat bran or cornmeal; put dough seam side down on towel and dust with more flour, bran or cornmeal. Cover with another cotton towel and let rise for about 2 hours. When it is ready, dough will be more than double in size and will not readily spring back when poked with a finger.
-
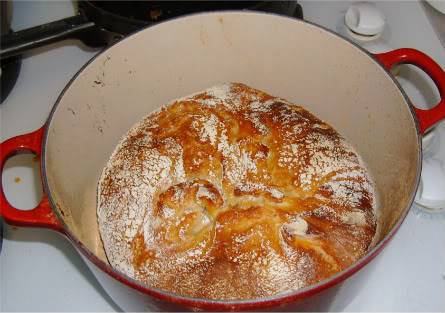
At least a half-hour before dough is ready, heat oven to 450 degrees. Put a 6- to 8-quart heavy covered pot (cast iron, enamel, Pyrex or ceramic) in oven as it heats. When dough is ready, carefully remove pot from oven. Slide your hand under towel and turn dough over into pot, seam side up; it may look like a mess, but that is O.K. Shake pan once or twice if dough is unevenly distributed; it will straighten out as it bakes. Cover with lid and bake 30 minutes, then remove lid and bake another 15 to 30 minutes, until loaf is beautifully browned. Cool on a rack.
In my yeast research, I came across this very helpful comment, so maybe it’s time to bust out the kitchen scale
Mark Bittman wrote another NYTimes article about fine-tuning this recipe. In it he said you could use whatever yeast you liked. 1/4 tsp. yeast translates into 1.25 ml, but by weight it is 1 gram. Also, the flour turns out to be 430 grams, the water is 345 grams and the salt 8 grams. He says that active dry yeast can be used without proofing so I guess it would be a good idea to proof caked yeast. He also increases the salt content to a scant 1 T. I have tried this and agree that it makes a tastier loaf.

[…] are some photos from my bread making journey. (see Part I for recipe and actual instructions). Mix the 3 ingredients together. I used a scale to measure the flour. It’s supposed to look […]